Compositing Sunrise


I really wanted to attempt to create a beautiful sunrise at the beginning of my animation, I think a sunrise can signify many different things especially the idea of new beginnings and rebirth. I had somewhat an idea on where to begin but I decided to check if youtube had any tutorials and it turns out it did!

I found this amazing tutorial, something I can hopefully revisit in the future as I really love her art style, very game like and really beautiful use of shadows and lighting.

( Sun rise video)

(Sun video)

Very similar to how I’ve composited the rest of my work, I simply saved every file as a PNG, imported it into After Effects and the tried to figure out how to make the timings work with my frames. It was definitely trial and error but was for sure something that I enjoyed doing and will come back to at a later date. I think that for me, learning these skills in this project is going to be incredibly useful for me when it comes to my personal showcase next term and my collaboration Project. I would, of course, love to be to incorporate this into my final film, perhaps it could work behind the credits or the title.

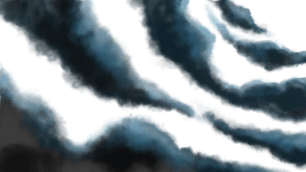
Below are examples of some of the layers I made in order to attempt to create a sunrise.

clouds 66.pngnew cloud.png

new new cloud.pngclouds.png

meSbNaU.jpgshot 1 s.png

shot 44.pngshot 5.png


Animatic

Now that my storyboard is at a point which I can start animating from I decided to start work on my animatic. First considered which scenes I was going to animate for my final 10 seconds and built on them up to keyframe stages, I’m still undecided exactly which part I want to render so, for now, I will focus on the parts which I am considering. My animation skills and techniques as a whole have improved quite a bit compared to last year, I’m more patient and make sure to keyframe properly as well as go over an animation a few times to make sure the movement is fluid.

Below is the beginnings of my animatic, there’s still a lot of forms and pieces missing as I wanted to concentrate on getting the key movement down as well as planning out the timing. I included the experimental scene at the beginning as well as a title page to see if it was something I would want to include. Again I really do like this scene but I’m just concerned that I won’t have enough room to fit it all in. Maybe if I planned my storyboard around fitting this in I could have made it work. But this is something I can always come back to the next term.

12/11/2018 – 16/11/2018 Week 8

Research sources List:
Google: Googled Historical contexts to work from. Found images as a source of inspiration.
Development
So this week our development took a different direction slightly, we were happy with the story of having this character leave the world above and enter a different, very very different world, but we were still not sure what exactly we wanted this different world to reflect. So we met up and started having ideas such as making connections to the real world and what if this world below had been at war, or something horrible had happened leaving the place ruined and mutations to form. I started to sketch out a new storyboard and both me and Hannah came up with new ideas and designs for characters that reflect this world.
Strengths

Me and Hannah work very well together, she has some really good design ideas and together with my storytelling and character concepts we are able to keep moulding this project into something we are both going to want to work at to make look great.
Areas to Develop
In terms of development for this project next week we need to both keep working on refining our ideas and conduct some more research so what we are doing has substance and meaning behind it.

12/11/2018 – 16/11/2018 Week 8

Research sources List:
Google: Googled references Images in order to create a moodboard and colour scheme to work from.
Youtube: Youtube tutorial on ‘How to make a fake anime’ which inspired me to use compositing on After Effects.
Development
This week has been productive, I have managed to create my final designs for all of my characters especially in regards to colour as that was something I was still pondering over. I have also redone my storyboard which is alot clearer and easier to work from which not only means I can start my final animatic but also start to create finished and rendered backgrounds to use for the final piece. This week I created a background with the aid of my moodboard and colour script and went as far as to composite it into After Effects and start playing around with lighting effects and pixel effects. I am still rather unfamiliar with the workings of After Effects but I’m pleased with the experimentation I have created. I’ve also began animating a few scenes and managed to render and finalise an idea that I’ms still not sure If I’m going to bring back into my final piece or keep as an experiment. However this piece with my main character sleeping in the background (which was an idea I had for a previous storyboard) has taught me how to uses masks, lighting, blur effects (which I did in photoshop) and much more.
Strengths
I’m now starting to see how my concept as a whole can come together, I feel that the clarity of my storytelling is there and is reflected through the way I have chosen my scenes, character expressions and camera angles. I’m starting to feel positive about the render experimental scene which I can’t wait to start adapting to the rest of my scenes and begin to finalise my character animation.
Areas for Development
Although I thought logically I could get the backgrounds done first before attempting a fully rendered animatic as process wise I wanted to logically create the background and the animated scene at the same time before putting them all together. I’m now concerned that I should perhaps do the whole animatic as the requirement for this brief is to have 10 Minimum seconds rendered and the way in which I’m going is attempting to animate the whole animation. I need to instead create my whole animatic and then select the area I wish to animate and if time allows it animate more.Research sources List:
Google: Googled references Images in order to create a moodboard and colour scheme to work from.
Youtube: Youtube tutorial on ‘How to make a fake anime’ which inspired me to use compositing on After Effects.